By Karen French of Warwick.
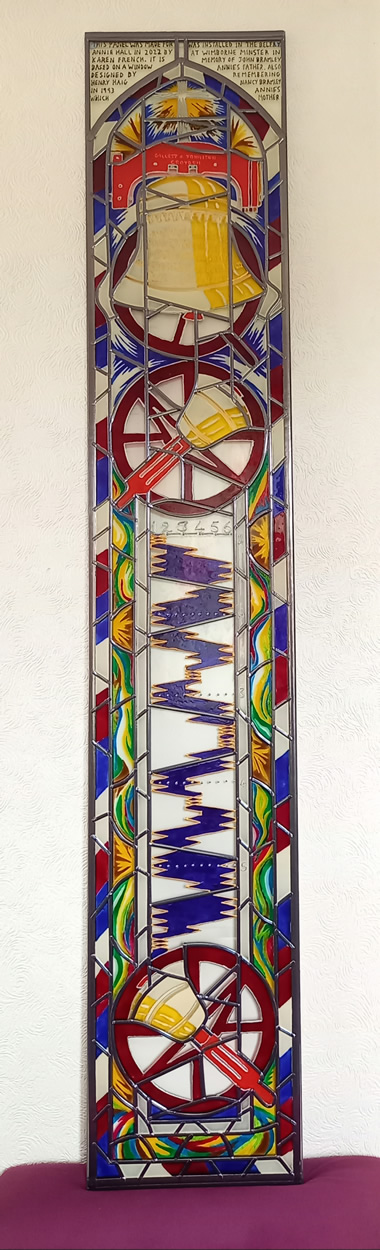
Here’s the story of my latest piece of artwork. I always seem to have an art project on the go but this one turned out to be quite a challenge and was rather special.
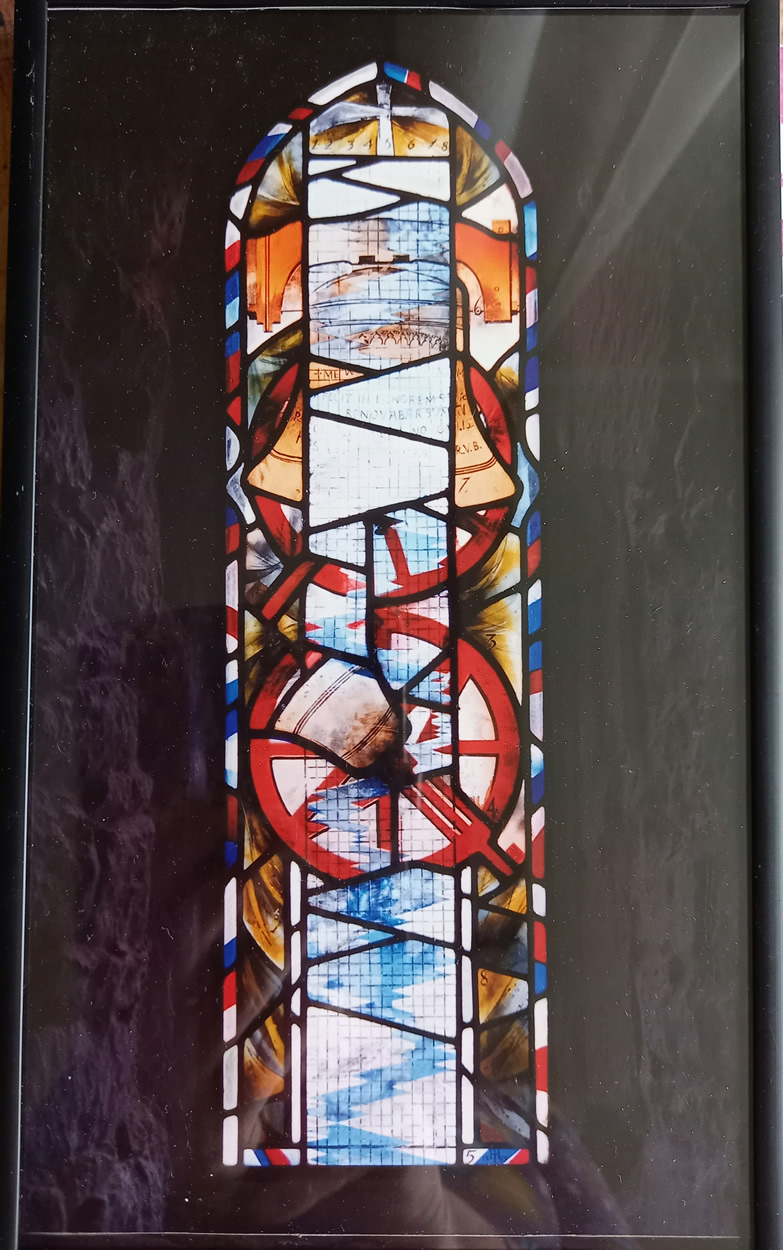
It all began back in March when fellow ringer at Warwick, Annie Hall, asked me if I would like to have a go at a glass painting that would go in the centre of a three pane glass dividing wall between the hall and sitting room in her house. I have done several large glass painting pictures over the last few years, but these were framed to hang on the wall, not to be looked through like a window. Asking what sort of design she had in mind, Annie produced a small framed photo of a stained glass window picturing two bells, a sally type border and a method running through from top to bottom among other details. This window was designed and made by Henry Haig and was installed in the belfry at Wimborne Minster in 1993 by request of the PCC. It was dedicated to the memory of John Bramley, Annie’s father who had been tower captain at the Minster. A newspaper article tucked in the back of the photo frame tells the story and shows a picture of Nancy Bramley, Annie’s mum, standing by the new window.
Of course I couldn’t resist so I took a photo of the framed picture and enlarged it on my laptop to try and see the details clearer. The sun was shining through the window so a few sections were blanked out. I then found some interesting things. The method running down through the window is Cambridge Surprise Major but the last lead is missing! The red white and blue sally running around the edge is not in the right colour order. Also the top bell is an image of the tenor bell at Wimborne Minster including its inscription but as it was part of this that was blank I looked up what the inscription should be and found there are at least a couple of mistakes in the lettering on the window that I can see.
Annie’s window measured 25cm wide and 144 cm tall which meant that if I scaled up the small photo to 25 cm wide it would only have been about 85cm tall. I didn’t want to do an exact replica of the original anyway so I would try and design a glass paint panel based on the main aspects of the original window to fill the available space. Lining paper is my go to thing for doing design work on, so an accurately sized piece was cut and design work began. I kept the two bells in their original position at the top and because of the extra length I turned the smaller bell design over and put one at the bottom. I didn’t want to do the method as on the original so I used the extra space in the middle for it. Cambridge Major would mean I only had 2mm per change which wouldn’t work, so Cambridge Minor it was. It fitted perfectly. Then I found out which colours of glass paints I had, so I knew which colour pencils to use on the paper design. About a month and twenty five hours later the design was done and approved.
Which glass to use was bothering me so my Dad, Raymond who I had been discussing this project with said because it was so tall and skinny we’d probably be best to use glass 6mm thick. Annie ordered the glass which had to be toughened as the bottom of it would be close to the floor. At least it should be strong enough not to break, hopefully!
I was going to do all the black lines representing the lead with black glass paint outliner and infill it with black glass paint, but my pot of black paint wasn’t usable, and before I tried to order some more, Dad suggested I use sticky backed window lead instead to give a more even finish. Having already done the design I didn’t want to have to alter it but luckily after a search online I found some 4.9mm wide lead which was just the perfect width, and some 9mm wide lead for round the edge. Having never used this, once it arrived, I got out a small picture frame and had a practice of a section of the design on the glass. Interesting! It didn’t take long to work out how to get a good result. I also tried out my glass paints at the same time to check they were still usable and how it would work with the lead. I just needed to rub the lead on a lot harder as the paint leaked through in places. Also with solvent based paint I would need the windows open!
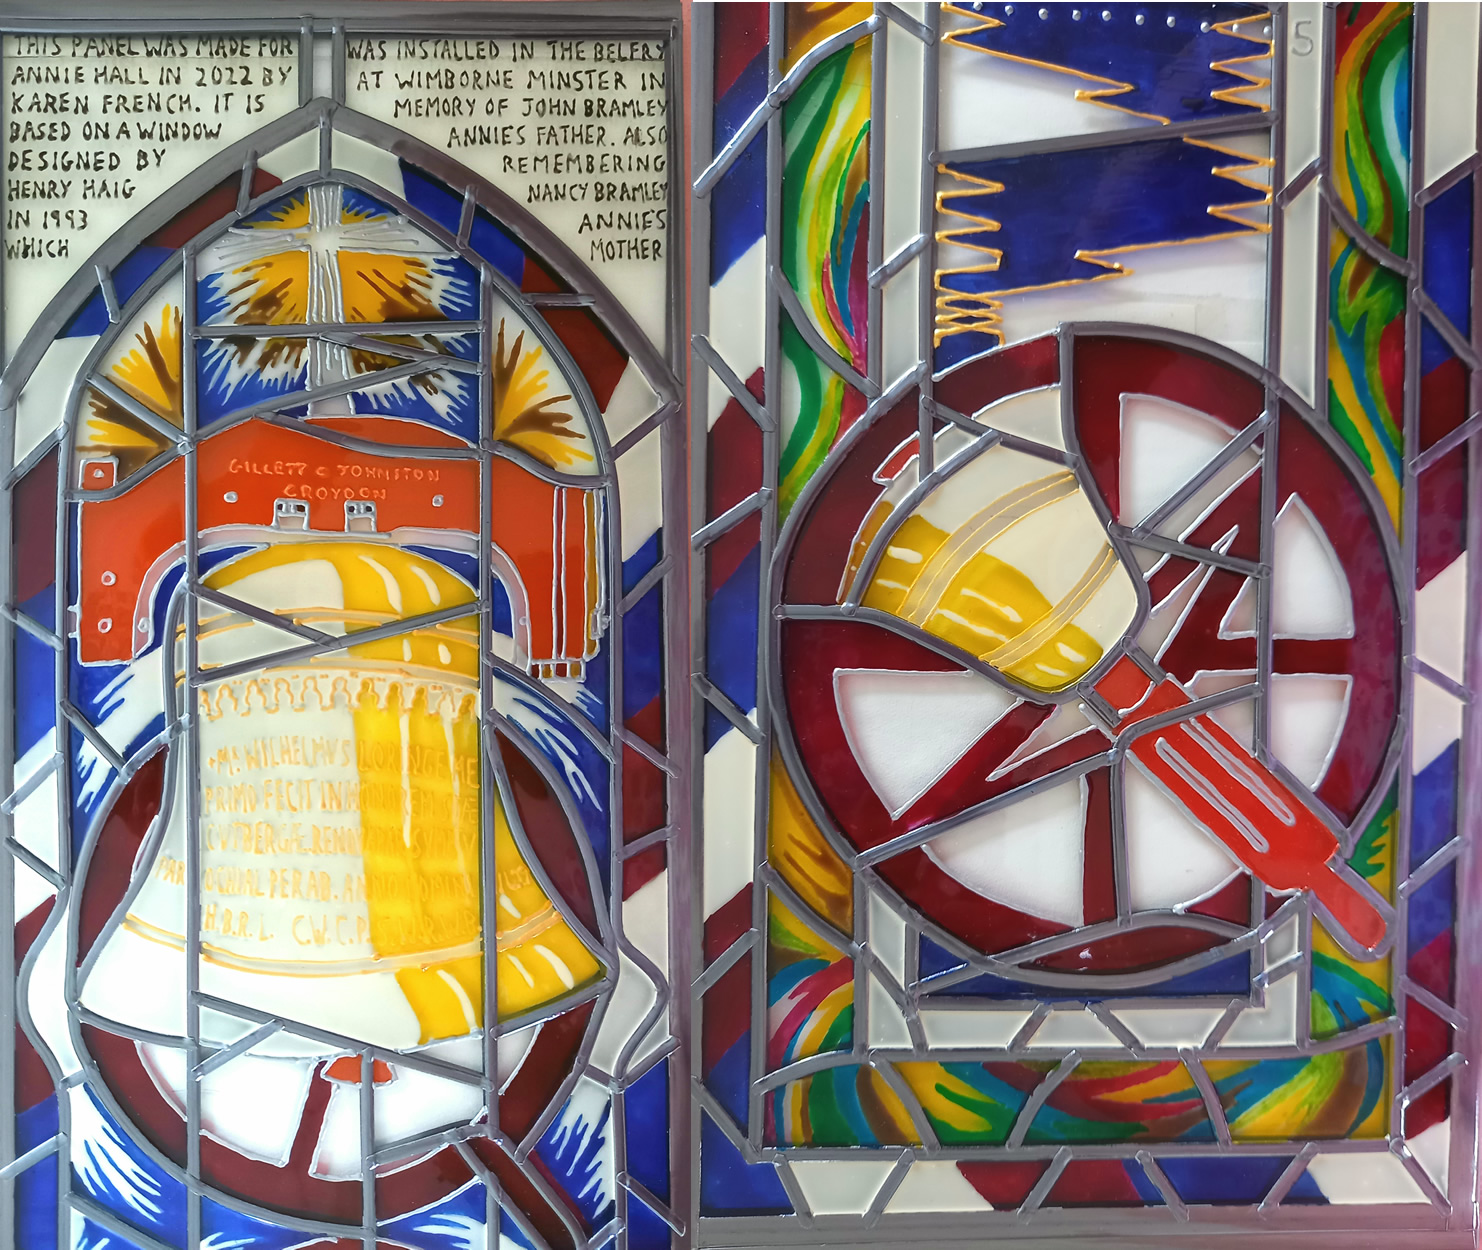
The glass arrived so I was ready to begin. As the panel has to be done laying down flat and my table wasn’t big enough, my storage cupboards upstairs were just the right length and the right height to stand up to work on it. With the paper design placed under the glass so I could follow the layout, I got on with the lead work. The first side with about 200 pieces of custom cut lead took 9 ½ hours over 8 days to complete. For the smaller lines that were needed between colours and to outline the method, the inscription on the bell and the writing above the top of the window I used silver, gold and black glass paint outliner which is squeezed out of a tiny nozzle from a tube. Steady hands needed for this! On to the paint, this was going to be trickier than a normal painting as it shrinks back slightly as it dries so I may get gaps showing between the paint and the lead when the light shines through. Each colour seems to have a different consistency, some is like painting with milk, others are a bit more sticky and harder to puddle on. I started with the blue and worked through each colour at a time. I used the same tiny paintbrush for all the painting. Once an area of paint is started you have to complete it as it gets tacky quite quickly. 16 ½ hours over 13 days saw the bulk of the painting finished, a few sections I’d had to put two coats of paint on to give an even finish. Luckily I’d had enough paint. Apart from the inscriptions which needed just one layer of outliner, all the other thin lines needed a second layer as I’ve found from previous paintings it just looks better. It was time to turn the panel over and start to put the lead on the reverse side to match the front. 8 ½ hours later over 5 days and another 200 pieces had been cut and stuck onto the glass and the reverse side was complete. Touch up time. The panel was getting heavy now with the lead on both sides and I had to hold it up on its thin edge so that I could see the light coming through it and touch up any tiny gaps where the paint had shrunk away from the lead.
How I was going to fix it in place against Annie’s existing pane of glass was the question. Dad came to the rescue again. We discussed numerous ideas, some sounded good but were not practical, so the simplest idea was to have a piece of wooden beading top and bottom and four wooden pegs, two on each side evenly spaced. I painted them black but in the end covered them in the lead to match the rest of the panel. Double sided sticky tape would fix them in place with two screws through the top beading for extra security.
The panel had taken me about 45 hours to complete, so with the 25 hours design time, it had taken a total of 70 hours over three months.
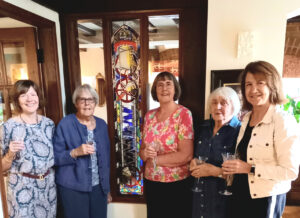
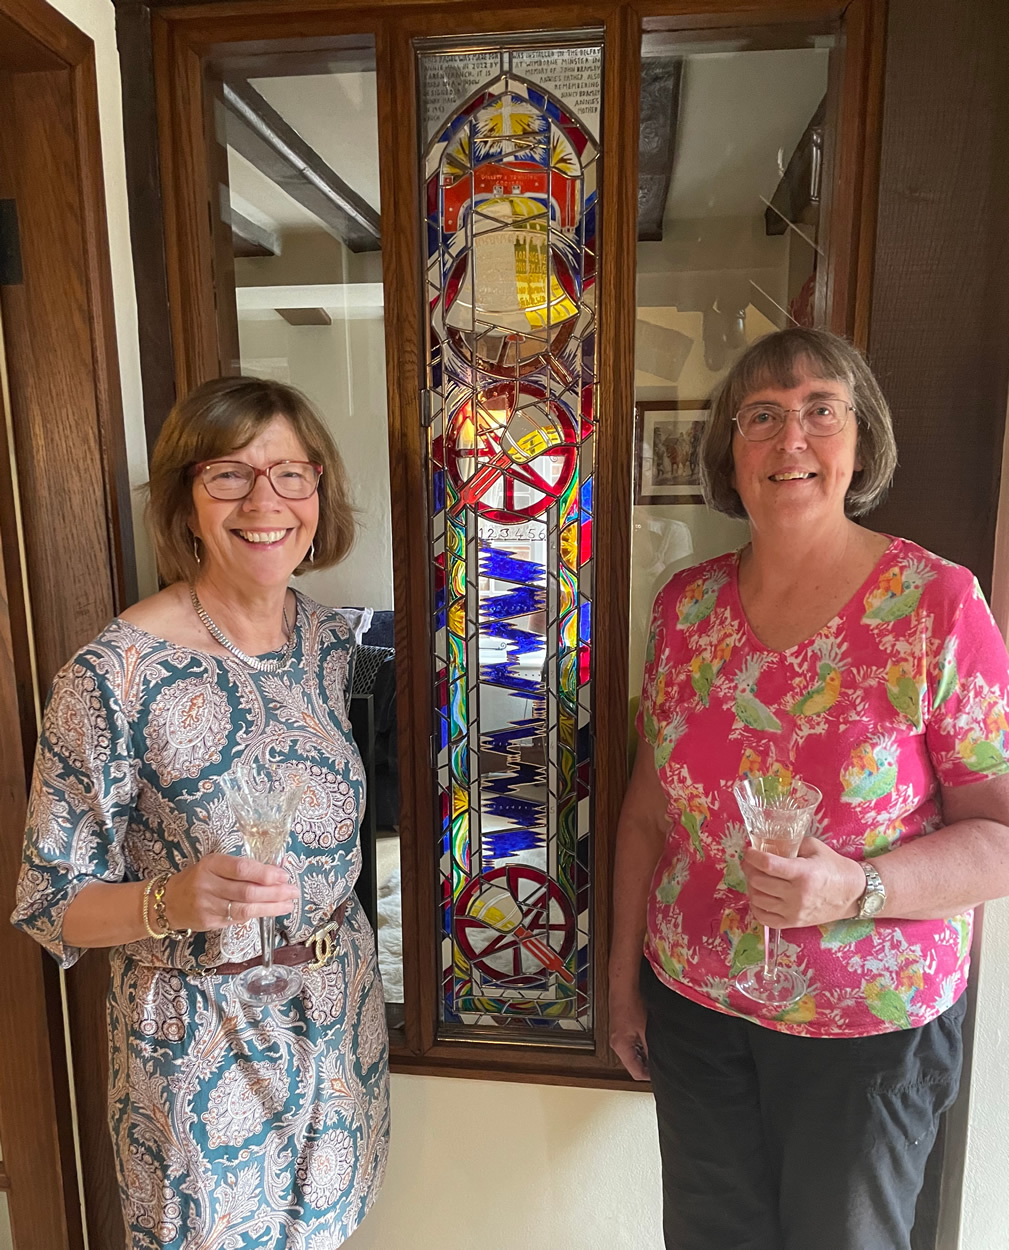
During lockdown a number of Warwick ladies had been meeting virtually for coffee on a Monday morning which became meetings at each other’s houses after restrictions lifted. Annie had the idea for me to take the panel to install in her house on a Monday morning when it was her turn to have us for coffee. So Monday 4th July 2022 was the date. A careful journey down the road to Annie’s house and between us we fixed it in place. It fitted perfectly. Annie then popped the cork and poured the bubbles ready to welcome Ruth Border, Chris and Ann Mew and Sarah Faulkner. Not quite the Royal Academy June Show but a good start to the week. I think they liked it. Photos were taken and coffee and chat followed the unveiling and the champagne.
I hope you enjoy your window for years to come Annie. I enjoyed making it.
Karen French.